News and Articles

Read about upcoming exhibitions and see art demonstrations and art tutorials from Dupont Art Club.

Book Jacket Talk – 12th October

image5
My thanks to Lesley McBride for again supplying notes and images for this talk. Caroline began by discussing the ways in which book covers are designed nowadays. Everyone uses a computer, employing either GIMP or Photoshop, which are both compatible with Mac and PCs , but GIMP is free. The work is done in layers: The first layer may be the author's name The second layer the title of the book The third layer the image you have chosen Caroline gave a quick demonstration using one of her still life images, and showed us how to manipulate the image to fit, and also how to change the background colour, font styles and colours to obtain the most effective result. You would go about choosing your image based upon what the book was about, e.g. historical, modern, spy, murder mystery, sci-fi, romance etc... Remember the design needs to stand out on the bookshelf. To this end it is useful to employ red either in the image or the lettering as the eye is always drawn to red. Similarly a nude is likely to draw attention. She discussed several book jackets that were used for Lord of the Flies, some of them being much more effective than others.  We all agreed that the one showing the silhouette of the young boy in white and the flies in red invading his brain was the most compelling. You may prefer another one, as it is a subjective thing. I have included copies of some of the jackets for your perusal. It should be borne in mind that the image should not make the lettering hard to decipher, they should complement each other, and the lettering should not be so stylized that it is confusing.

Watercolour Textures Demo 28th September

Textures-8-e1475578330974
Caroline introduced a number of ways to produce washes, using both a paintbrush and other materials to get varied effects. The first was with an upright board and brush: Wet on dry Wet on wet Graded Wet on dry: using a flat 1” brush and dark paint, not too water brush once across and drag down for a drop down effect Wet in wet: using very clean water and wet paper, soak in for a minute. Paint across quickly…don’t over-work, then paint across. Graded: Start with a sideways sweep and use less colour for a graded effect. Clouds can be inserted by using a balled tissue to remove the paint. Note: Kurt Jackson used watery paint and turned the board sideways to dribble and splatters too! Flat work using materials for application  Cling film: using strong colours, apply cling film and ruche it. Leave to dry before removing for a foliage effect. Can also be used for rocks, using dark brown, green and wet in wet red. Washing-up liquid: can be used for waves by squirting into applied wet paint. Dry brushing: on very dry paint, drag a dry brush across. Fan brush: use to produce a wood grain effect Oil pastels: use colour free pastels and make marks, then brush over with a wash of colour. Salt: put on a wash, and quickly sprinkle on salt. Leave until fully dry before brushing off the salt. Good for a rain effect or snow on a dark ground. Scratching:  Apply the wash then then scratch with scissors to make trees. Scratch downwards so paint goes into runnels.  

Abstract Still Life Demo14th September

Abstract-Still-Life-0
Many thanks to Lesley McBride, who kindly provided the photos and commentary for this demo. The still life Carolyn selected to work from was this: Artists often pick out one aspect of the still life. Difficult to know where to start?  Consider:  Look at line  Look at colours: are they warm or cool?  Colours talk to each other with often magical results.  Try using a colour wheel to see how each colour affects another.  Look at light/shadow/shapes. Remember you can also use the negative spaces. Cubists use shapes as their main focus. Always make sure you have a focal point. You may choose to be either objective using the colours and shapes of the object in front of you, or you could be non-objective and express your feelings about the object without actually painting any physical aspects of the object itself. You should think about colour, tone, light value and composition Carolyn started by establishing her focal point, which in this case were the flowers.  She wanted the focal point to be vibrant and lively with the base more subdued. She decided to use the jug handle opting for black as this leads the eye up to the focal point. (Use black sparingly.) She put some folds of fabric into the base using subdued colours which complemented the rest of the painting. Red was used in the base to lead your eye around the painting. This is the finished work, completed in less than 30 minutes.

Abstracts in Watercolour 31st August

Mad-Chicken
Using a photograph of a farmyard battle between two cockerels, Caroline introduced abstract painting with the concepts of non-objective, by which we express something from within, and objective, in which the artist paints their impression of a subject. Caroline chose to begin with the tail feathers of the black & white bird, using bold strokes of black, which she later etched with the end of the paintbrush. Then, the opposing bird, which was ginger, was positioned using feathered strokes. A beak was added, and an angry eye! Pink dewlaps completed the confrontational element, which also gave the appearance of bloodied beaks. Loosely painted the dribbled effects added to the atmosphere of aggression and fowl play!

Water Colour Portraits 4th August 2016

Stephanie Butler Watercolour Portrait Demo 4th August 2016 Last Thursday the club arranged a demonstration by Stephanie, using watercolour for portraiture, which was very well attended. Stephanie advises using a palette of 6-7 basic colours, listed below: Aureolin, permanent rose, cerulean, cobalt, ultramarine, burnt sienna, permanent rose. Stephanie starts with a very faint drawing of the subject. First, put masking fluid on the eye highlights, using a straight paperclip. Using a mop brush, wash the basic shadow areas with water. Then mix one of the blues with permanent rose for a mauve and drop randomly in the wet shaded areas. On the light side of the face, mix aureolin yellow and permanent rose for flesh tones. Only paint as much as you can control. Eyes will get the most work, so vary tones by using a darker mauve for the pupils and eye edges. Remove the masking fluid and soften the eye whites. Dark skin subjects: mix burnt sienna with permanent rose for skin tones, and use shades of mauve for shaded areas. Use violet rose for a stronger mouth colour. Blend hair with the background colour to unify the image. Stephanie brought a delightful selection of cards and prints  for sale, and there is a video of her painting on YouTube, for reference: https://www.youtube.com/watch?v=AroSL73Ks5o Some tips: To make black, mix indigo and cadmium red. Washes: don’t look for the wet parts, just drop the paint in. Hair: don’t try and copy each hair, use lowlights. Paper clip: good for hairs and whiskers. Preferred Materials: Artists paper 300 grams. Fabiano Winsor & Newton Artist’s grade water colours Rosemary & Co: No 12 Da Vinci mop brush and rigger  

Using Resins in Art – A Demonstration

IMG_2624a
  On Wednesday, July 27th members of the Dupont Art Club were treated to a demonstration on the artistic use of resins by Aram Friedrich and Rob Jenkins of Eli-Chem Resins U.K. Aram explained that 95 percent of their business was industrial and 5 percent was for artistic purposes. They have excellent demonstrations on their website listed below which one should review for the detail on how the artistic process works. The use of resin as a painting medium results in a contemporary abstract design. By pouring the clear resin on paintings, the colour in the painting is much enhanced leaving the surface glass like and hard. Those who do watercolour were pleased that they would not have to use heavy glass over their paintings if they elected to use a resin top coat. During the demonstration, the class was allowed to add coloured resin to a surface to make a contemporary design. The photos below show how it first looks before some mixing and hardening. Although not a masterpiece (15 artists dabbling away) it does show the depth of colour and design possible. Aram stated that if members of Dupont were to order as a group, we would receive the reduced rate he offered on July 27th. Those interested should contact a board member to inform them of your interest. At the end of the afternoon, everyone attending agreed that it was very worthwhile learning of this new product with some embracing it as a new medium to choose to pursue. Aram Friedrich Eli-Chem Resins U.K Ltd 
Astra House, The Common, Cranleigh 
Surrey, GU6 8RZ, United Kingdom aram@elichem.co.uk 
www.elichem.co.uk Tel : +44 ( 0 ) 1483 26 66 36 or 37 
Fax: +44 ( 0 ) 1483 26 66 50 
Mobile : +44 ( 0 ) 77 11 66 9607

Seas Demo July 20th

Sea4-2
Caroline showed a number of images from the work of Kurt Jackson among others, drawing attention to his techniques of painting the sea in stripes with a thin stripe on the horizon, and his use of “splattering”. As Caroline started to paint, she said that the horizon often disappears. The focus should be on either a bland sky and detailed sea or vice-versa. There is no need to to go into every wave and foam, just think about the atmosphere. Colours used were ultramarine mixed with phthalo green, a line of white under that, followed by blue. Put on a mid-tone first, moving the brush from side to side. Colours go paler and more yellow the nearer to shore. Waves: Save the whitest areas of paper for foam. Use pale green for the waves and work in white over the green. Use runny white for splattering. .

Painting Rocks Demo June 22nd

Rocks-001-2
Painting Rocks Demo 22nd June   Caroline showed several photos from her sketchbook. Make dark and shadow shapes first, and then washes of colour after light. You can use sandpaper on the rock for surface (NB Put shapes in first with a light pencil). She mixes gouache with the watercolour to make some colours more opaque. Don’t over-water the paint, as it could affect your paper. Caroline then coloured the washes green, then went over them with red to tone them down, especially for the shadows.  

Presentation & Pricing of Pictures for an Exhibition.

As we have our exhibition coming up, we have decided to add an extra lecture/demo by Caroline Marsland at our regular class on July 13,  Wednesday afternoon at 130. it will be on presentation and pricing of pictures for an exhibition. All Members are invited to join the Wednesday class if they like and stay to paint.

Composition and Simplification

IMG_2165
Our Wednesday. June 8th Dupont class lecture  with Caroline Marsland covered composition and simplification. It was an excellent class for all levels of artist. Some of the main points she covered were as followed: Decide early on what it is you wish to express in your picture and centre your design around this. Paint with large brushes using large shapes, Give yourself a time deadline to paint to, Do several thumbnail sketches first, Feel free to move or add objects in the picture to improve your design, Our eye is always drawn to a human figure in a picture. Tissot was used as an example of a great artist who was the master of simplification so if possible, study some of his paintings. Caroline used a photo of the familiar seven sisters  where she moved objects around to create a good composition. The photo below showed the result of this.   

Hashim Akib Demonstration Review

IMG_4087
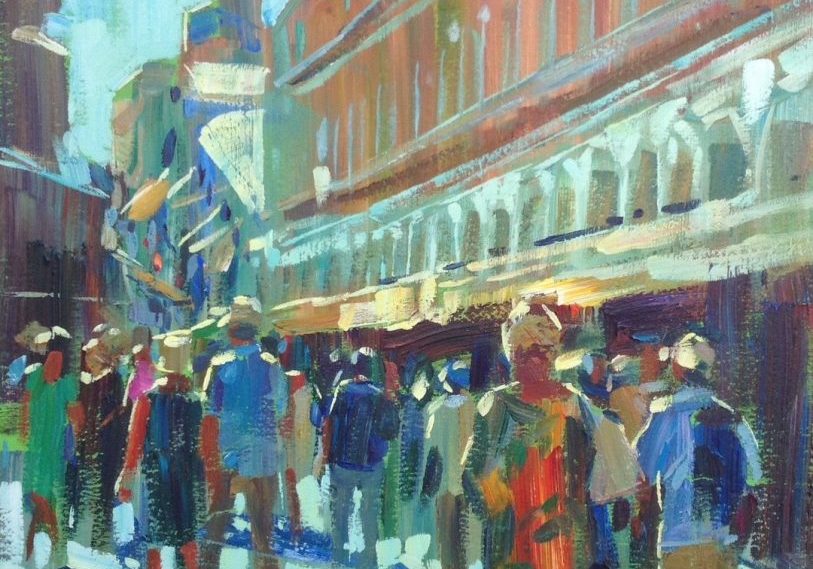
Recently a number of Dupont members attended an acrylic painting demonstration by well known artist Hashim Akib. Demonstration in Acrylics by Hashim Akib at St Helen’s Hall, Hangleton August 22nd 2015 Hashim Akib commenced the demonstration by showing us his preferred paints. He uses Daler Rowney System 3, heavy body colours from large tubes, which are reasonably priced and about a quarter of the cost of Golden acrylics. He piles his colours into a large, round palette with white paint in the central portion. His brushes are wide, flat ended decorator type brushes. He had a leaf-green prepared background on his canvas and was ready to start after showing us three photos, one of which we chose by a show of hands. It was an image of tourists walking down a Venetian street in bright sunlight. This would be his reference picture and he attached it to the left side of his canvas. The picture showed a large, historic building on the right with arched windows receding to further buildings with a tower in the background. Buildings on the left were undefined and cast in dark shadow. The figures occupied the centre foreground, reducing in size towards the farthest buildings and gave a sense of scale to the image. The sun cast deep shadows around them. Hashim Akib has a distinctive style, using large strokes with his flat brushes. He achieves lively, fresh paintings in bold, bright colours. Hashim had not used this Venetian photo as a reference before so he took a minute or two to absorb it, then chose his colours to block in the main building. The warm ochre colour was achieved by mixing several colours on his brush and blended together. These included white, burnt sienna, yellow ochre with violet and blue green to give it...

Big Picture Painted
IMG_8576
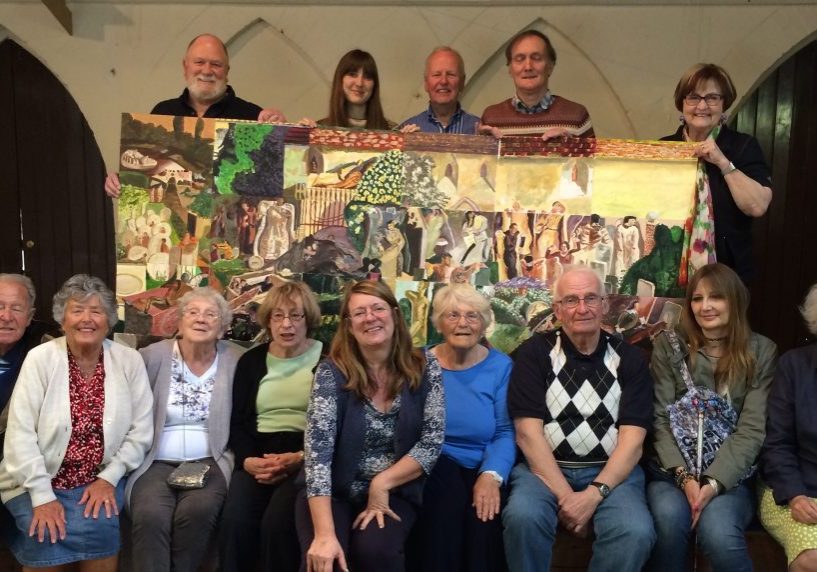
Over twenty artists from Dupont painted their way through Samuel Spencer's 'The Resurrection of Cookham' on May 29th at Ventnor Hall. When we first gazed at this picture, it was hard to keep track of who was raising out of which gravestone but after study, you could see what a humerous  and technically painted piece this was. With twenty artists each working on our own small section, struggling to see what they were suppose to paint, I'm afraid that Mr. Spencer would have rolled in his grave! The piece lacked the continuity of previous big pictures and one struggles to make sense of what we are seeing. Never the less, everyone had a fun time with this one Many comments could be heard around the room about discovery of a rising bodies in their piece which at first looked like a shadows, and people trying to match up colours with neighbouring tiles being painted. All in all, a good time was had by all. Maybe a nice Monet might be easier to get continuity in the future. Many photos will follow shortly .

Painting In the Garden

IMG_8504
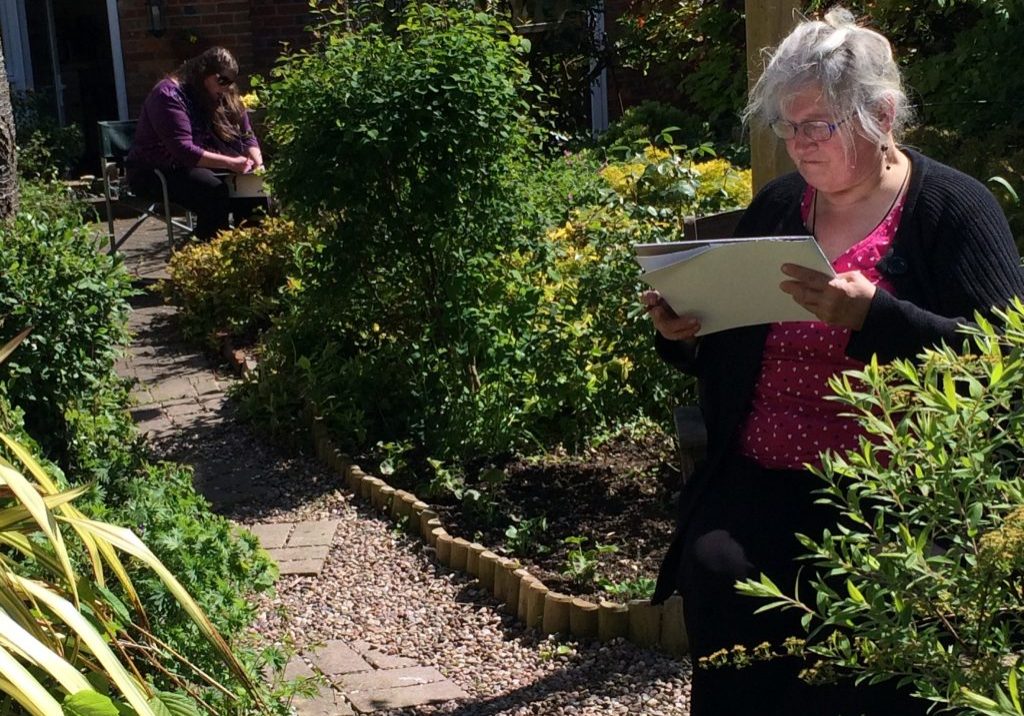
A few brave souls joined Judy Alexander in her back garden for an afternoon of painting. With all of the spring flowers in bloom, it was a chance to hone ones skills with plein aire painting. The cakes and tea were welcomed after  as the wind was brisk and cool.  

Sorry, we couldn't find any posts. Please try a different search.