Caroline started her discussion talking about different types of pens and how to approach line drawing with them. In discussing the pens we are referring to the different types of ink formulations that they use. Caroline talked more on fountain pens and dip pens but there are others such as ballpoint pens, gel pens, roller ball,felt pens, et cetera. Each of these can affect your technique. An example is that gel pens provide smooth vibrant lines, ballpoint pens offer more control and durability and dip pens can give a variety of widths of lines.
In discussing the fountain pens, Caroline mentioned that her favourite fountain pen is a Scrivener. Like many fountain pens they can be filled from an ink bottle or they will take pre-filled cartridges. With both fountain pens and dip pens you can vary the line produced by pressing hard or soft. This is not the case with many of the felt tipped pens which are made with certain shapes and circumference of nib to give specific lines. Rotary pens are like this and are used for specific drawing needs. There are also refillable fine liner and brush pens such as the Lumos brand.
Dip pens come with a variety of nibs, all shape and sizes. They have a reservoir attached that vary in size before needing to dip again. There are some that even have a sponge underneath where you could draw for 1 to 2 hours.
Carol suggests that the best all-around ink to use for the fountain and dip pens would be Quink ink. You can also use water soluble inks but not India ink or specific calligraphy inks which can gum up the nib.
Caroline recommends Tom‘s studio which is an environmentally sensitive studio of innovative and handcrafted tools and pens.(https.//www.tomesstudio.com)
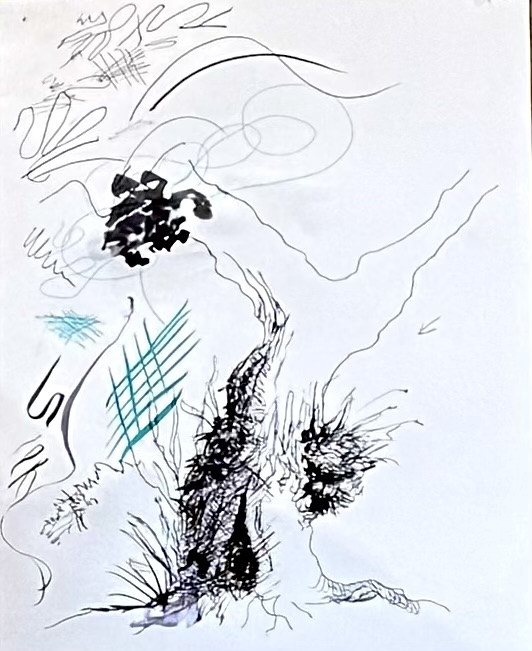
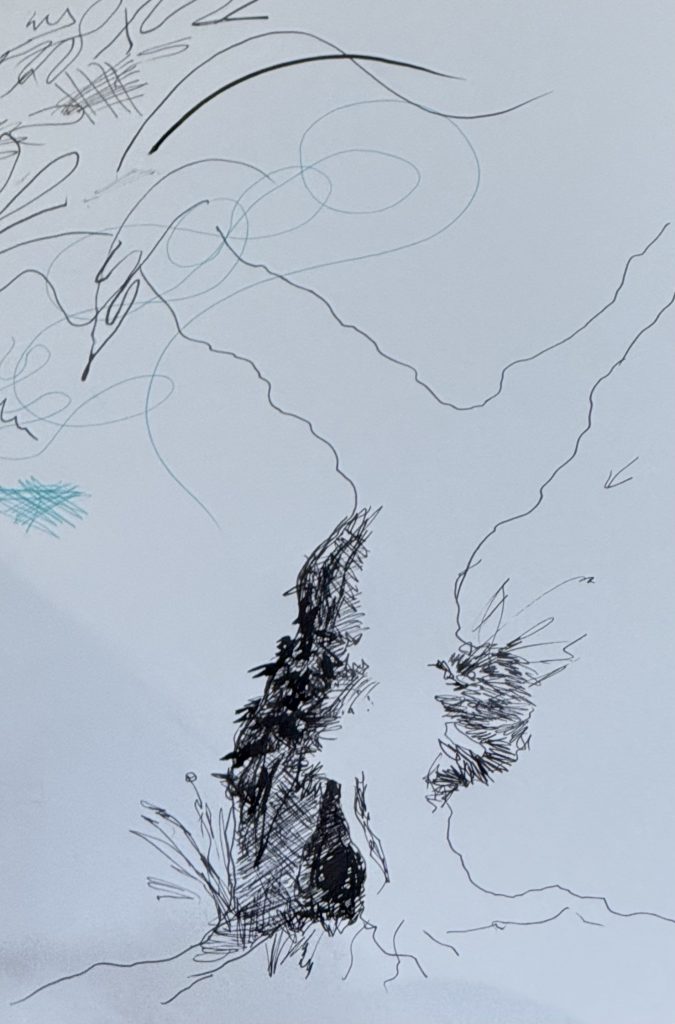
When drawing, you need to vary the pressure on the pen to achieve thick, bold and delicate thin lines. She also uses crosshatching and styling to add texture and shading to the drawing. The hatching involves placing lines dots or small strokes to create the illusion of shadows and form.
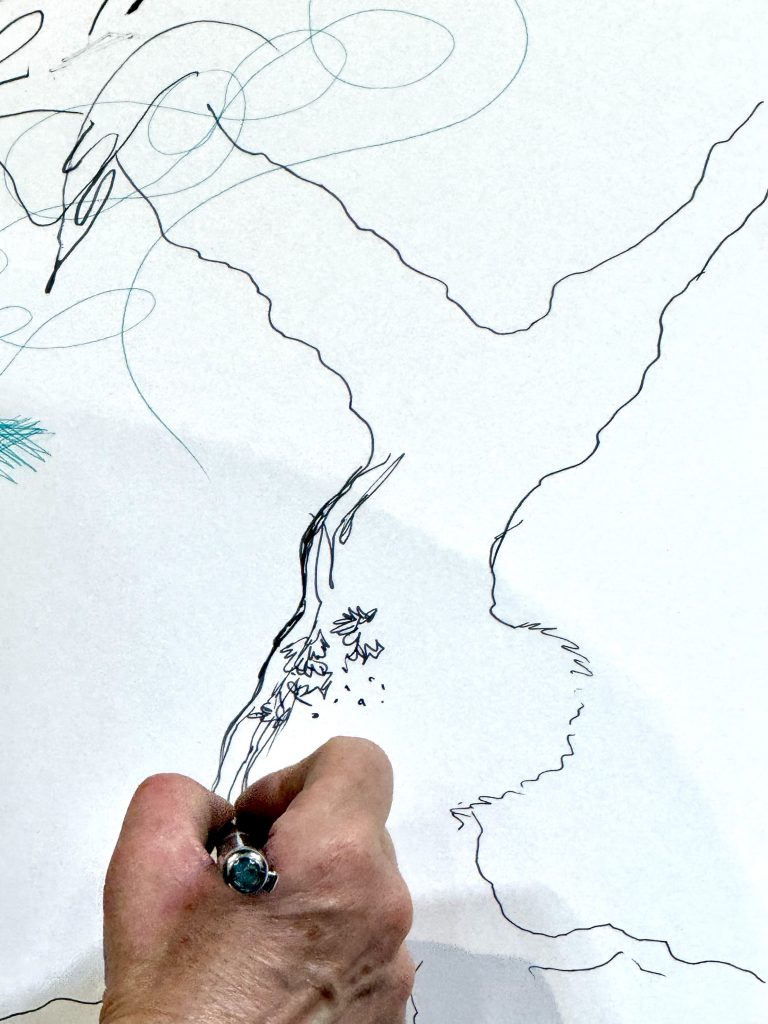
Caroline started her picture with a light pencil drawing of an old tree. This was followed with an outline using her fountain pen. The shadows using crosshatchings at different angles were used. She layered this to get depth and darkness. She stated the focal area should be the darkest against the light. She changed to a dip pen to get fine lines and different textures. At this point she mentioned that dip pens also come in glass in case you have a very rough surface to paint on. The nib which is built-in has a spiral to keep lots of ink as you proceed.
If you want to try using ink, the dip pen is the least expensive. You can get various nibs for it and changing colours is easy by just changing the ink you are using.
You can extend your line drawing by combining it with other mediums. It could include watercolours, markers, coloured pencils or even digital tools to add depth, vibrancy and texture to your pen drawings. You can experiment by layering different effects as well. Enjoy!