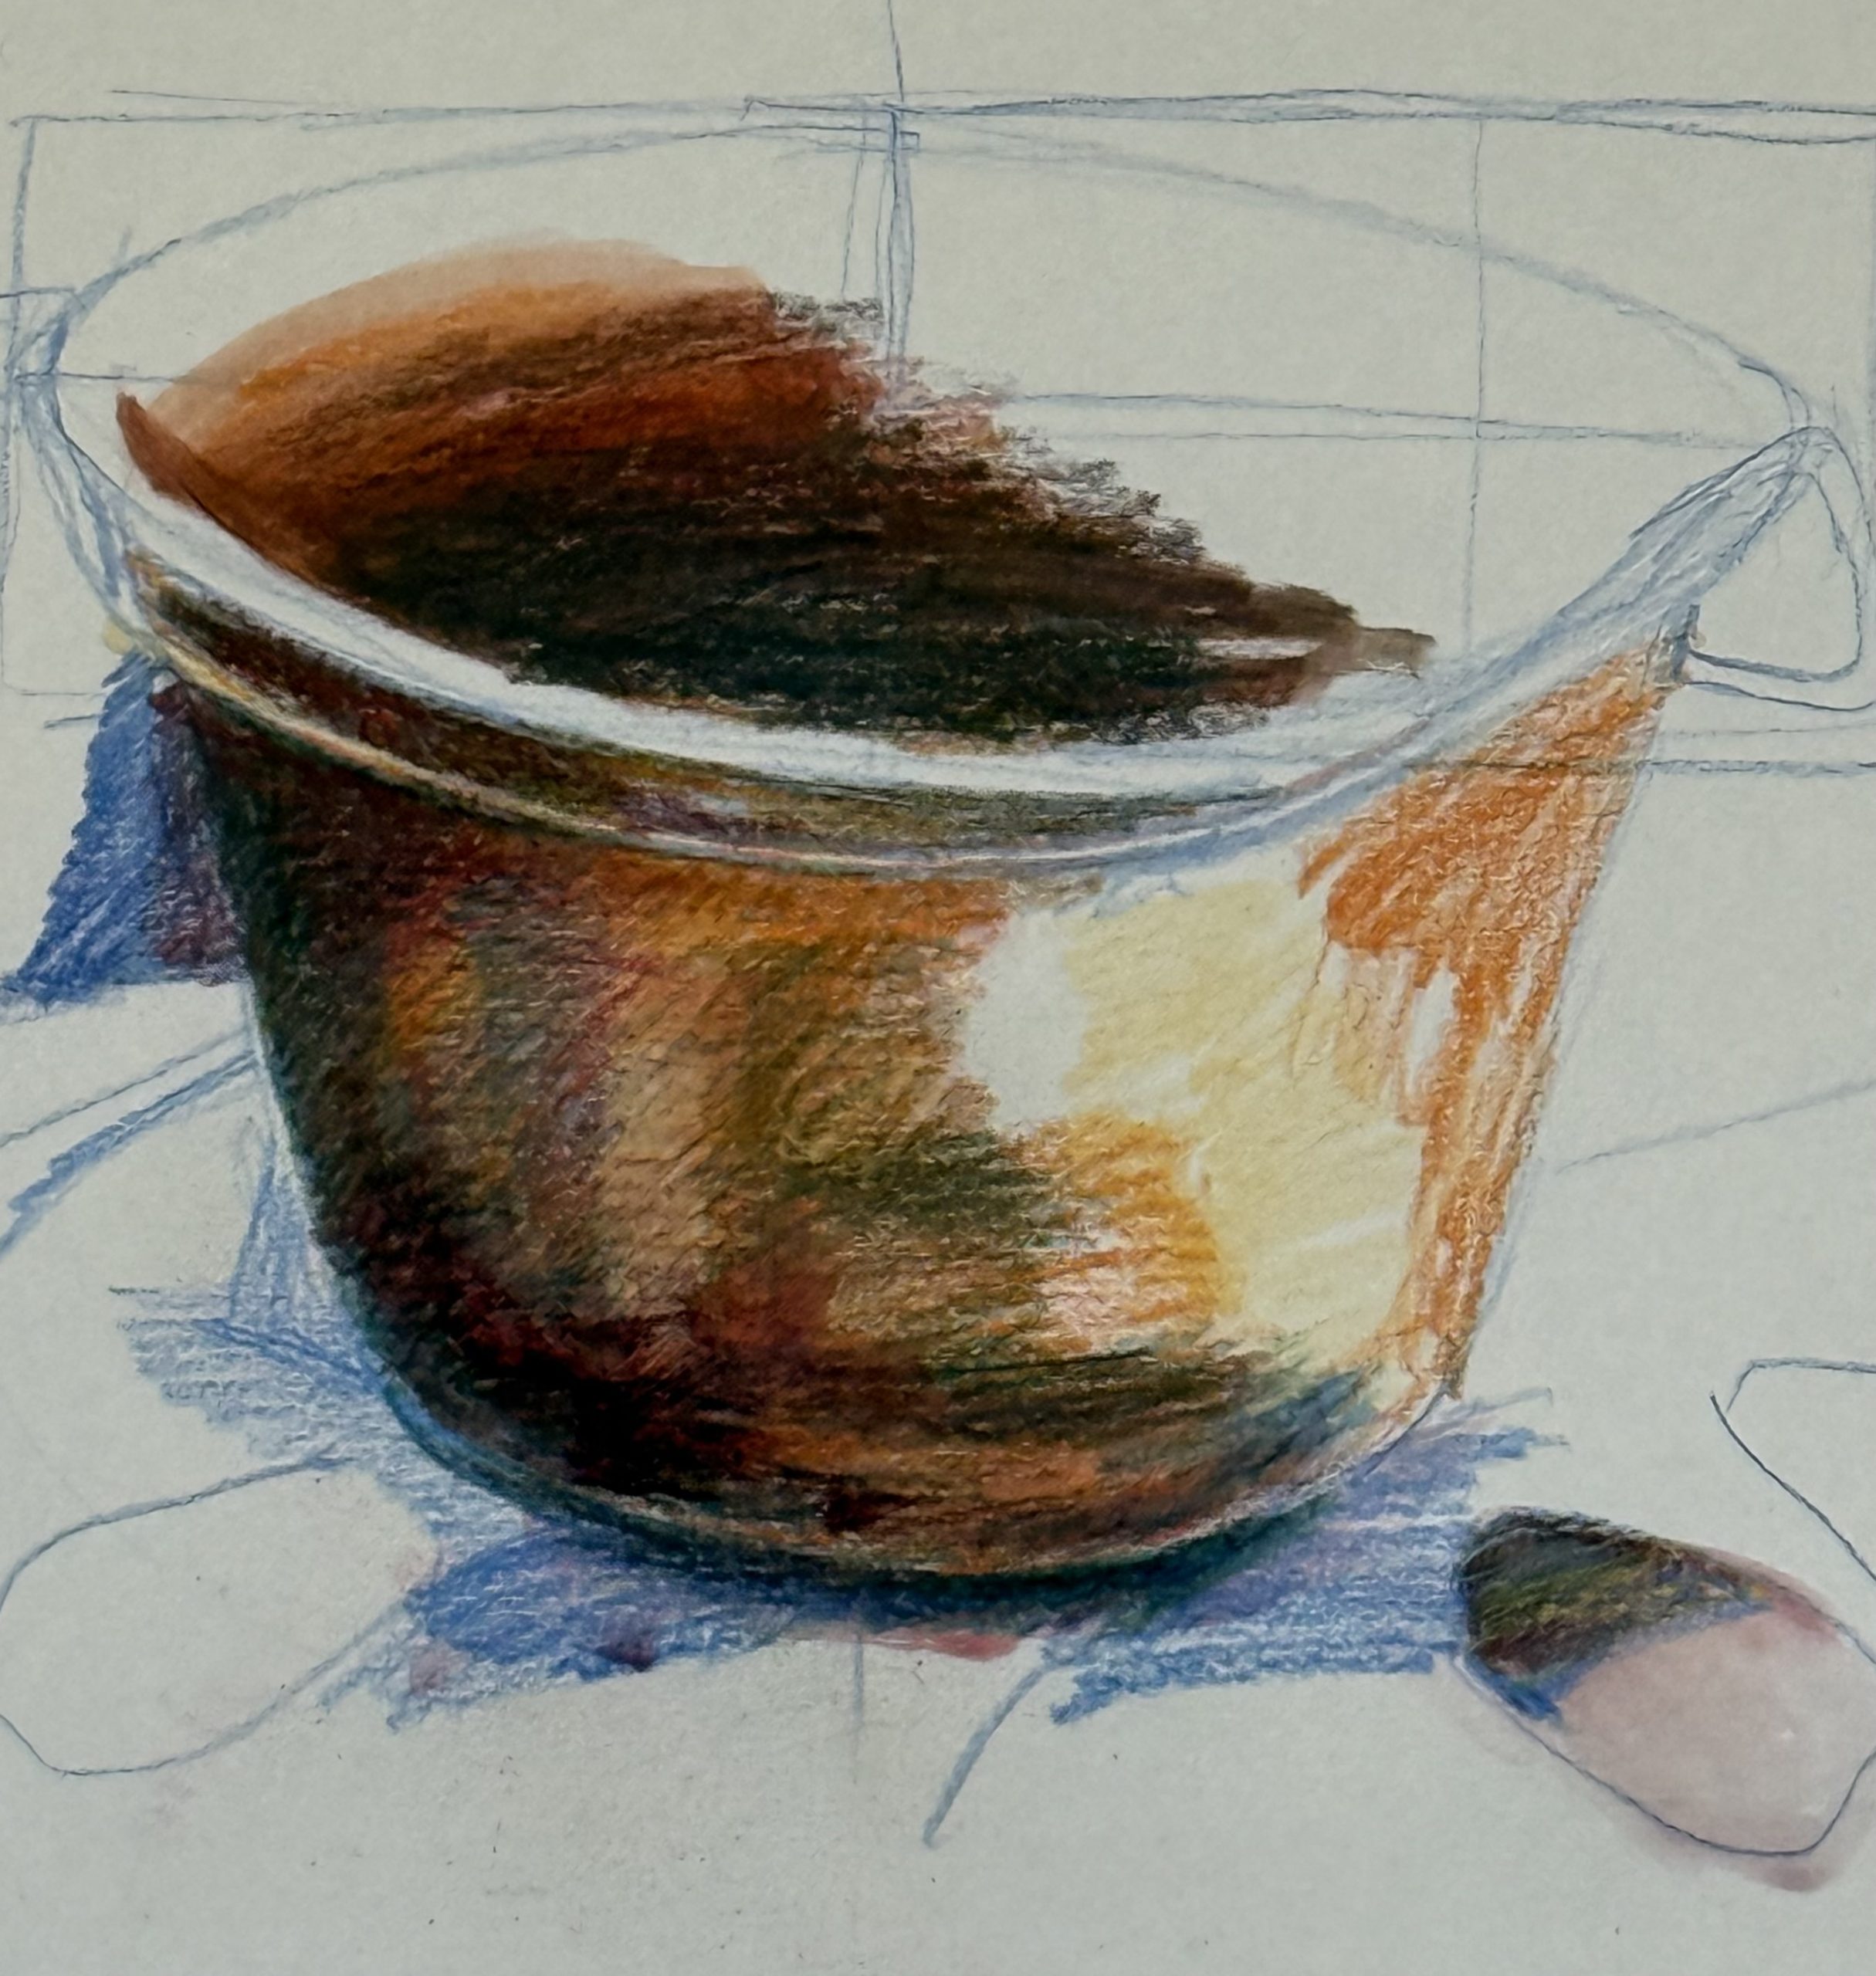
Caroline started the class teaching the use of colored pencils. She stated that cheap inexpensive pencils do not work well when using colored pencils for a full picture. The best pencils have a high pigment content. You need to use a thick cartridge paper with tooth which can take the rubbing in that occurs using pencils.
She chooses the 4 to 5 pencils she will need for this project and has them handy in her hand so they are readily available. She starts with a light sketch of this pot. She is going to be going from light to dark with the pencils and started with a blue colour which fills out the dark tone areas Layering is what is needed with pencils. You can use the regular layering or cross hatching as well. When layering, please note that the last color you put on will be the one that will show. She mentioned again that in order to get a nice black tone she uses a dark blue red and green to give a warm black. In order to get a rich dark brown, you could add orange over the black.
Doing pictures with pencils can give you very sharp edges and photo realism. Remember to keep your pencils sharpened. In order to get softened edges, she blends them lightly. Once finished with the drawing, she uses a burnisher at the end to push the color into the thick paper. This gives it a soft, shiny look.
One of the class members asked about water, soluble pencils. She explained that if you look at the stem of the pencil, the water soluble ones have a small brush on the stem which indicates that it is water soluble. You can use them with this technique dry and not add water if you choose.